A subscription form is a method of collecting email addresses to send out newsletters later.
NewsMAN makes the process of creating subscription forms easier by adding a new version of form builder that you can modify with the drag and drop editor.
Below is the list of the main BUILDER form types:
- static form or landing page
- pop-up
- up / down bar
- sidebar
- wheel of fortune
1. How do I create a static form?
Go to Settings > Subscription forms, click on the Create form button:

The Create Form window will pop up, here you name it and choose the type of form you want.
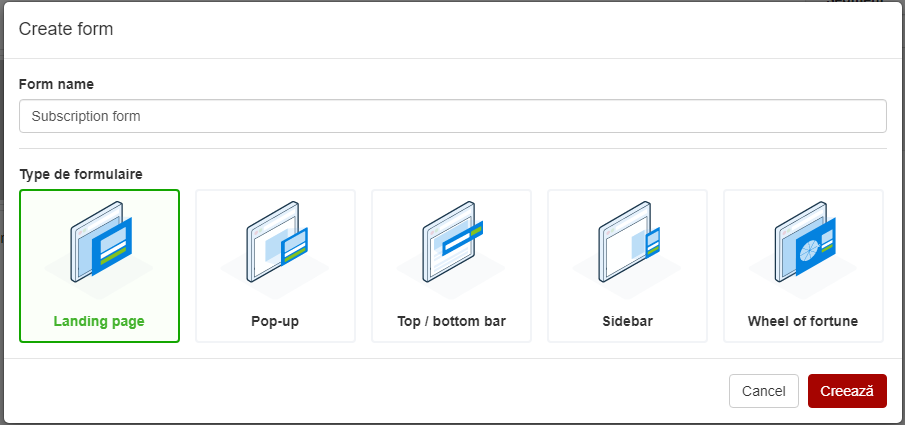
For a static form, choose landing page then click on the Create button:
You will be redirected to the Edit subscription form page.
2.How do I edit the form?
In the Form tab, you will see the default form below:
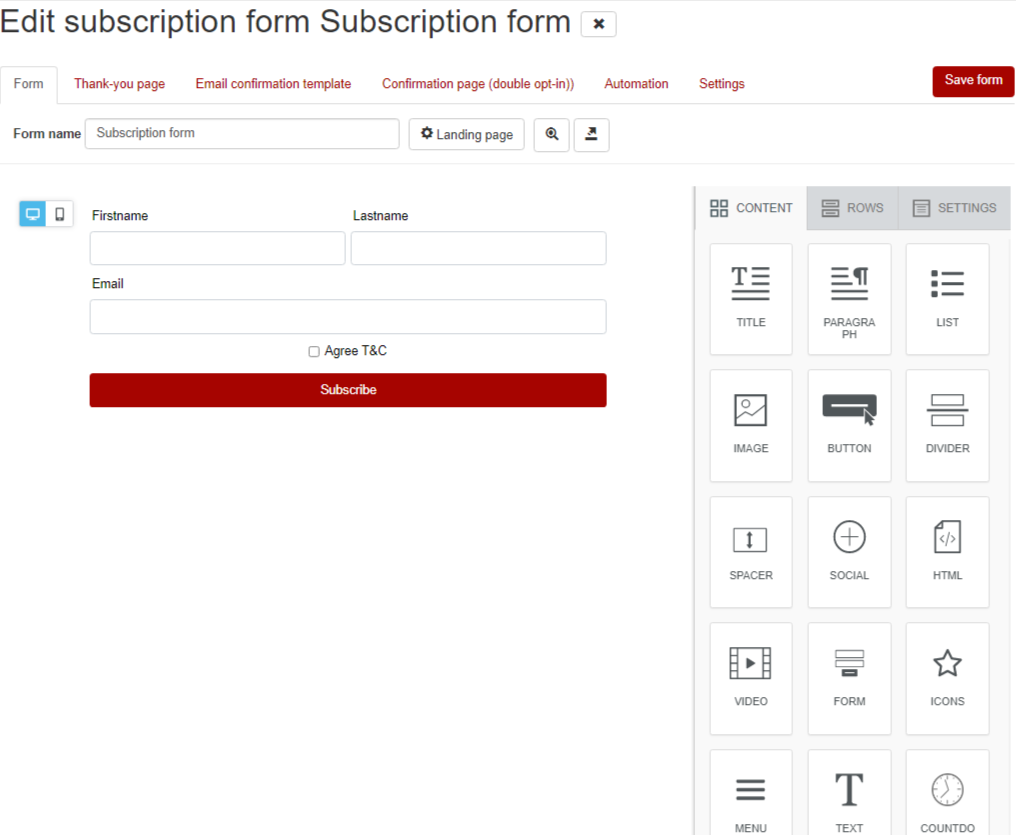
To edit it, click on the form, and you will see the Form customization button on the right:

Clicking on this button will display the Form customization window, from which you will be able to delete, add, move or customize elements (or fields).
If you want to delete e.g. your first name and surname, click on the trash can icon corresponding to these items:

To move a row press the + button and drag in the desired direction:

3. How do I add a new field in the builder form?
Suppose you want to add two fields: one for the phone number and a second one for the newsletter sending frequency (weekly or monthly):
a. Phone field
For a phone field in the Form Customization window:
- click on 1 at the bottom and add a new row with one element:
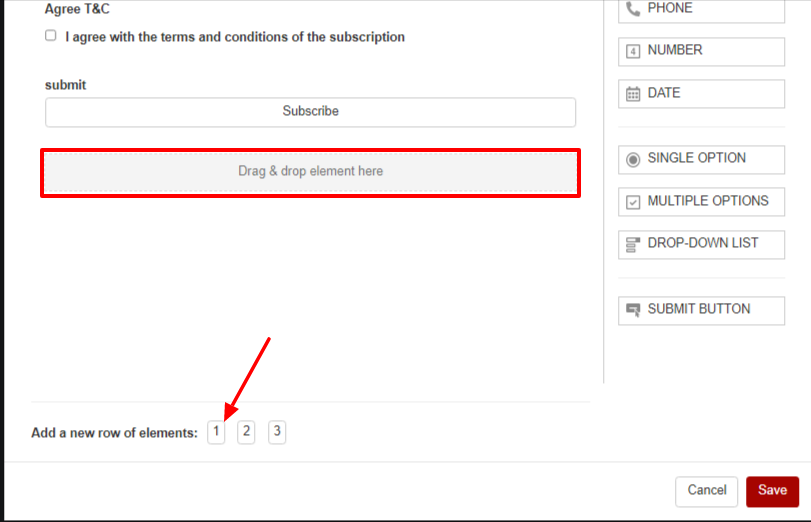
The new row will automatically appear below the Subscribe button, but you can place it where you want it by using the +.
- from the right, you will drag the PHONE item into the row you just added:

- click on the pencil icon, then the Edit item section will appear:
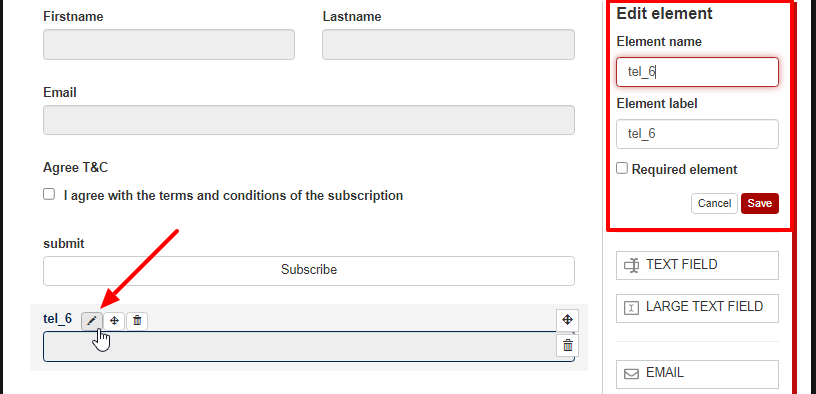
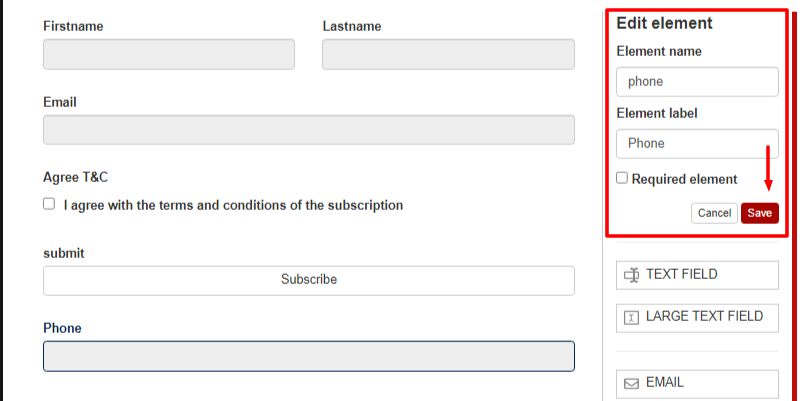
- from Edit element you can set:
- Element name, which will be the name of the variable corresponding to this field and which you will be able to use when segmenting, for example,
- Element label, this will be displayed next to the field,
- and Required element (check this option if you want this field to be mandatory)
b. Field for the frequency of sending newsletter
For a field for the frequency of sending the newsletter:
- add a new row with a single element
- and drag the item MULTIPLE OPTIONS into the row:
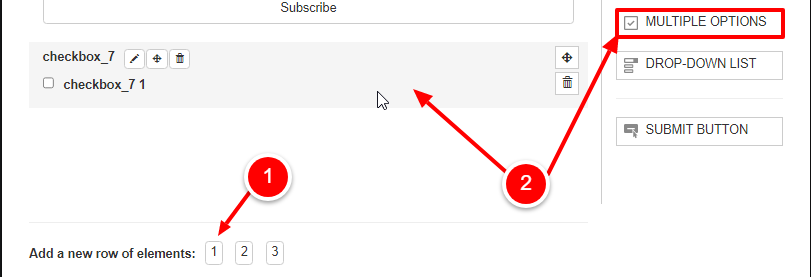
- click on the pencil and change the preset options in the Edit Element section as in the image below, then save the new changes:
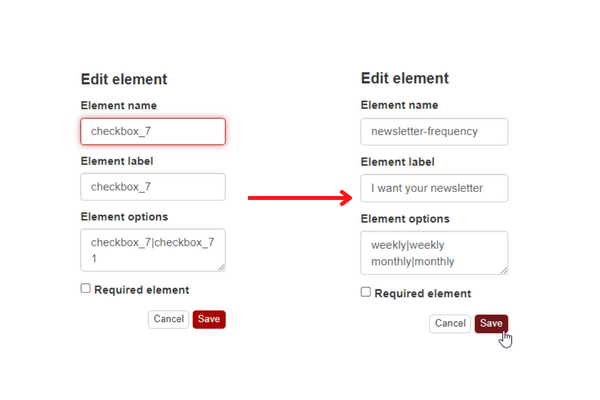
The multiple options field will look like this:
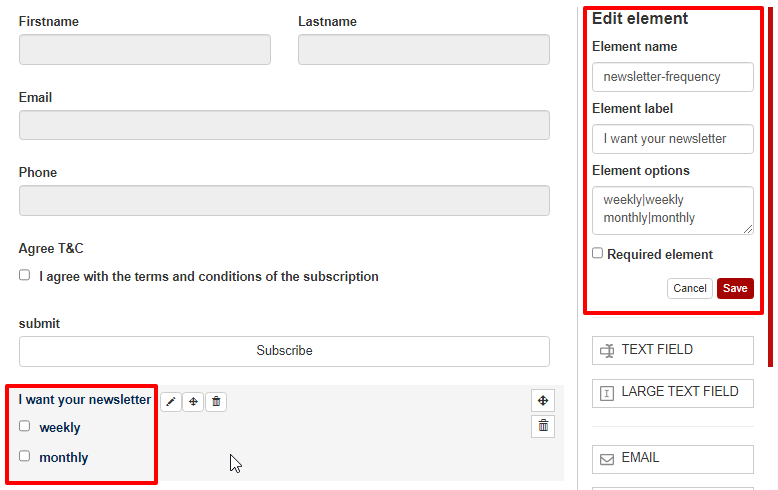
When you are finished, press the Save button at the bottom of the Form Customization window.
You can also use the MULTIPLE OPTIONS element if you want to add a list to select categories or fields of interest.
4. How do I add a link to the terms and conditions page?
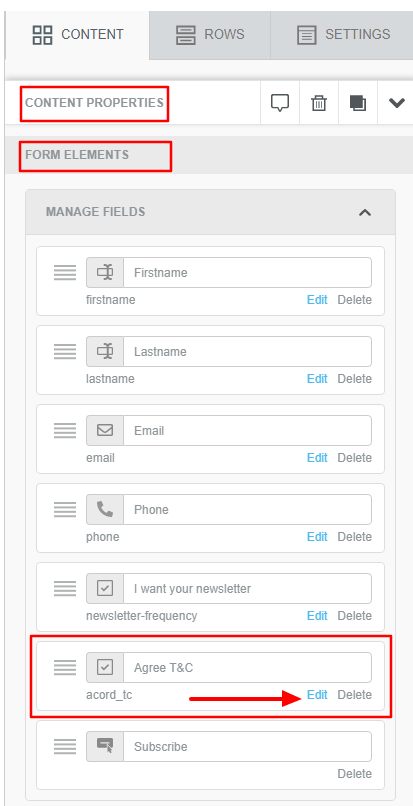
From the right, Content > Content Properties > scroll to Form Elements > Manage Fields and click on the Edit button of the Terms Agreement field:
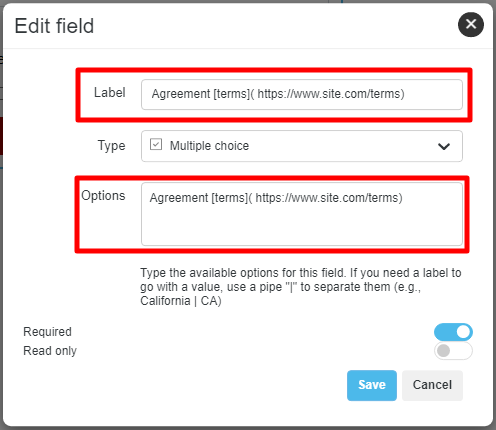
In the Edit Field window, under Label replace Terms Agreement with Agreement [terms]( https://www.site.com/terms).
Between the round brackets, add the link to your terms and conditions page.
Under Options, type the same text as above and press Save.
Then press and Save form on the top right:

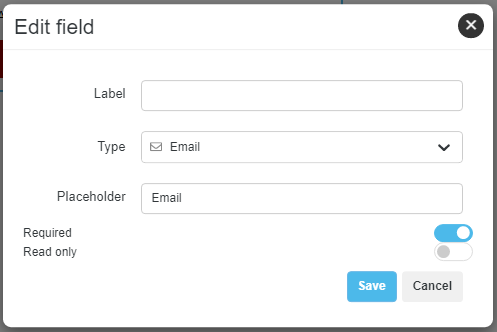
Also, from the Content Properties > Form Elements > Manage Fields section, you can delete the label for the email field (if you want this) as follows:
- click on Edit for the Email Address field
- in the Edit Field window, delete Email from the Label box and leave a space
- under Placeholder fill in Email:
5. How do I preview the created form?
Above the form, you will see the preview button.
From Preview mode you can select between desktop, tablet or mobile display:

NOTE: After each change, press the Save Form button in the top right.
Changes to a form appear on the site 30 minutes after saving.
6 . How do I add the form to the website?
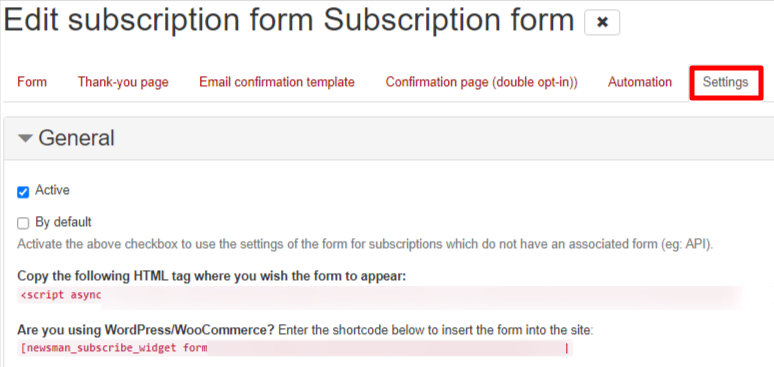
When you have reached the final form, go to the Settings tab.
This will automatically open General section and:
- you will be able to activate the form if you tick the checkbox Active
- you will find the HTML tag to add to the site where you want the form to appear
Also in Settings you will see the options:
- Segments: which allows you to associate segments to the created form. Once you have set a segment here, addresses will be included in the list as well as in this segment.
- Responder: if you fill in URL Redirect, the subscriber will be redirected to the link you inserted
- Email notifications: if you enter an email address here, you will be sent emails with information about subscriptions
- Opt-in: checking this box will disable the subscription confirmation email.
7. Other options
For each form, you will be able to change the following:
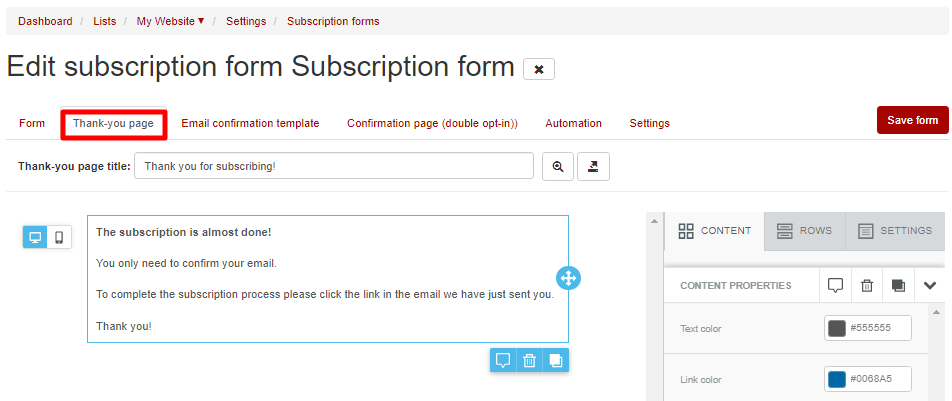
- Thank-you page – you can change the thank-you message displayed after the future subscriber has filled in the email address and pressed the Subscribe button:
- Email confirmation template – you can change the email by which people confirm their subscription to the newsletter
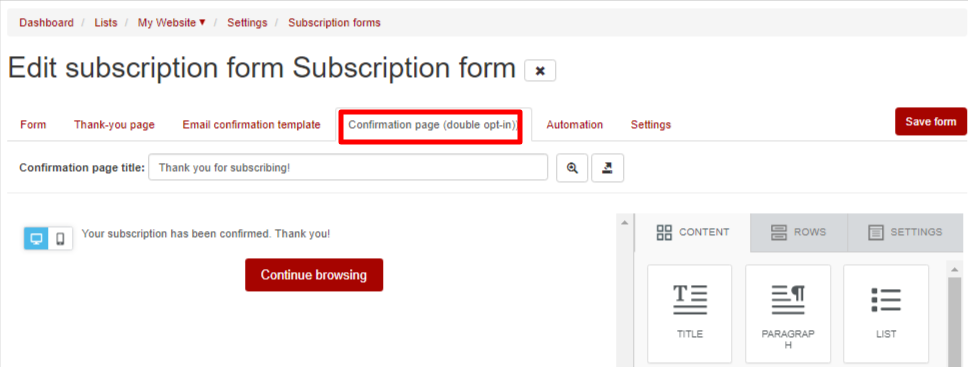
- Confirmation page (double opt-in) – you can replace the message displayed after subscription confirmation:
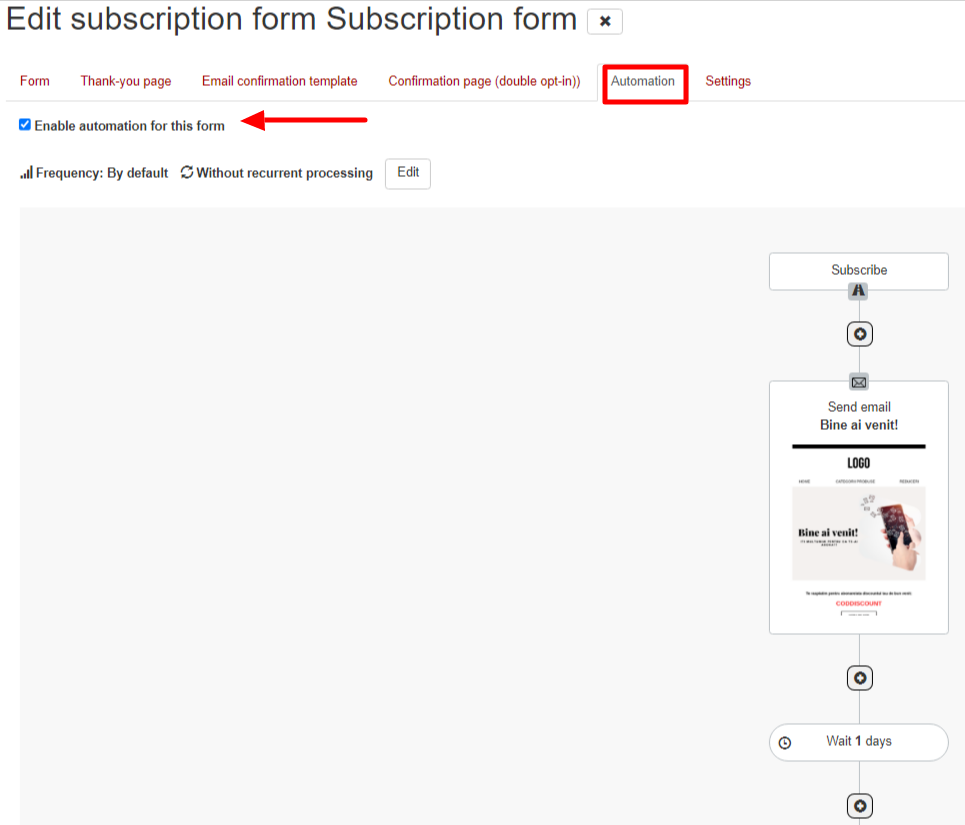
- Automation – from this tab, you can connect the form builder with an automation.
The welcome automation will be activated and you can easily change it.
